

Need to determine the age of a customer, a product or an event from a simple date?
Power Query or DAX: It’s up to you to choose the method that best fits into your model.
Calculating age in Power BI: Two possible methods
You have a date, a customer, a product, an event… and you need to know its age.
In Power BI, there are several paths to the result, and each tells a different story: Power Query to transform your data at the source, DAX to enrich your model with finesse.
Let‘s see how to calculate an age easily, and especially how to choose the most suitable method for your needs.
Calculate an age with Power Query
Add a column
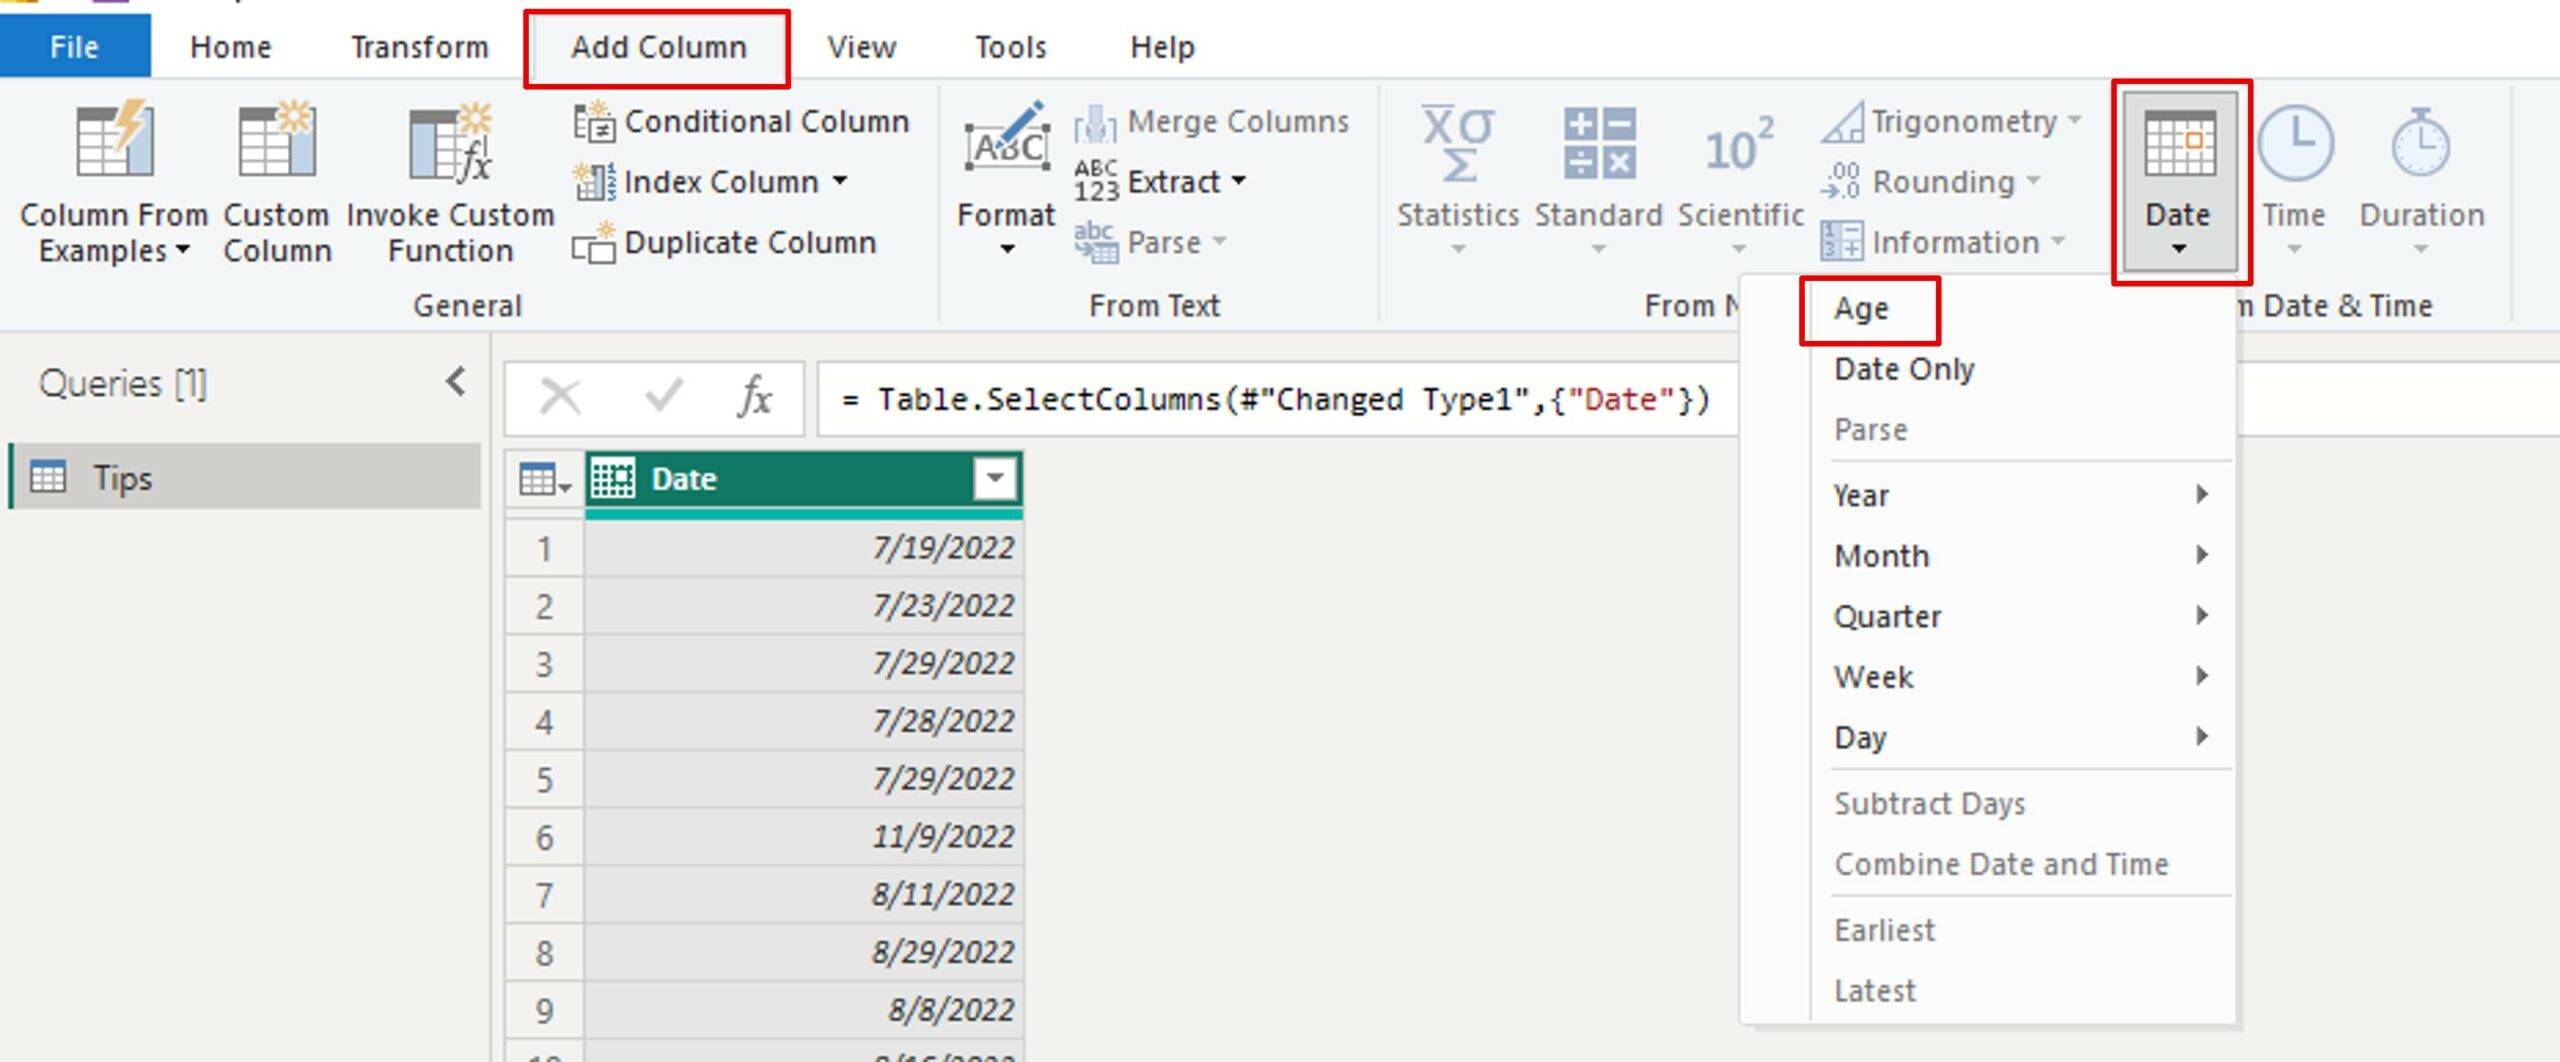
To calculate an age through Power Query, select the date column for which you want to calculate the age.
You can go to the Transform or Add Column menu:
- Using the Transform menu will modify your date column – you’ll lose the orginal date.
- Using the Add Column menu will add a new column and keep the date column, but it makes your model heavier.
In our example, we go to the Add Column menu.
Then, click on Date, and then click on Age.
Convert the duration
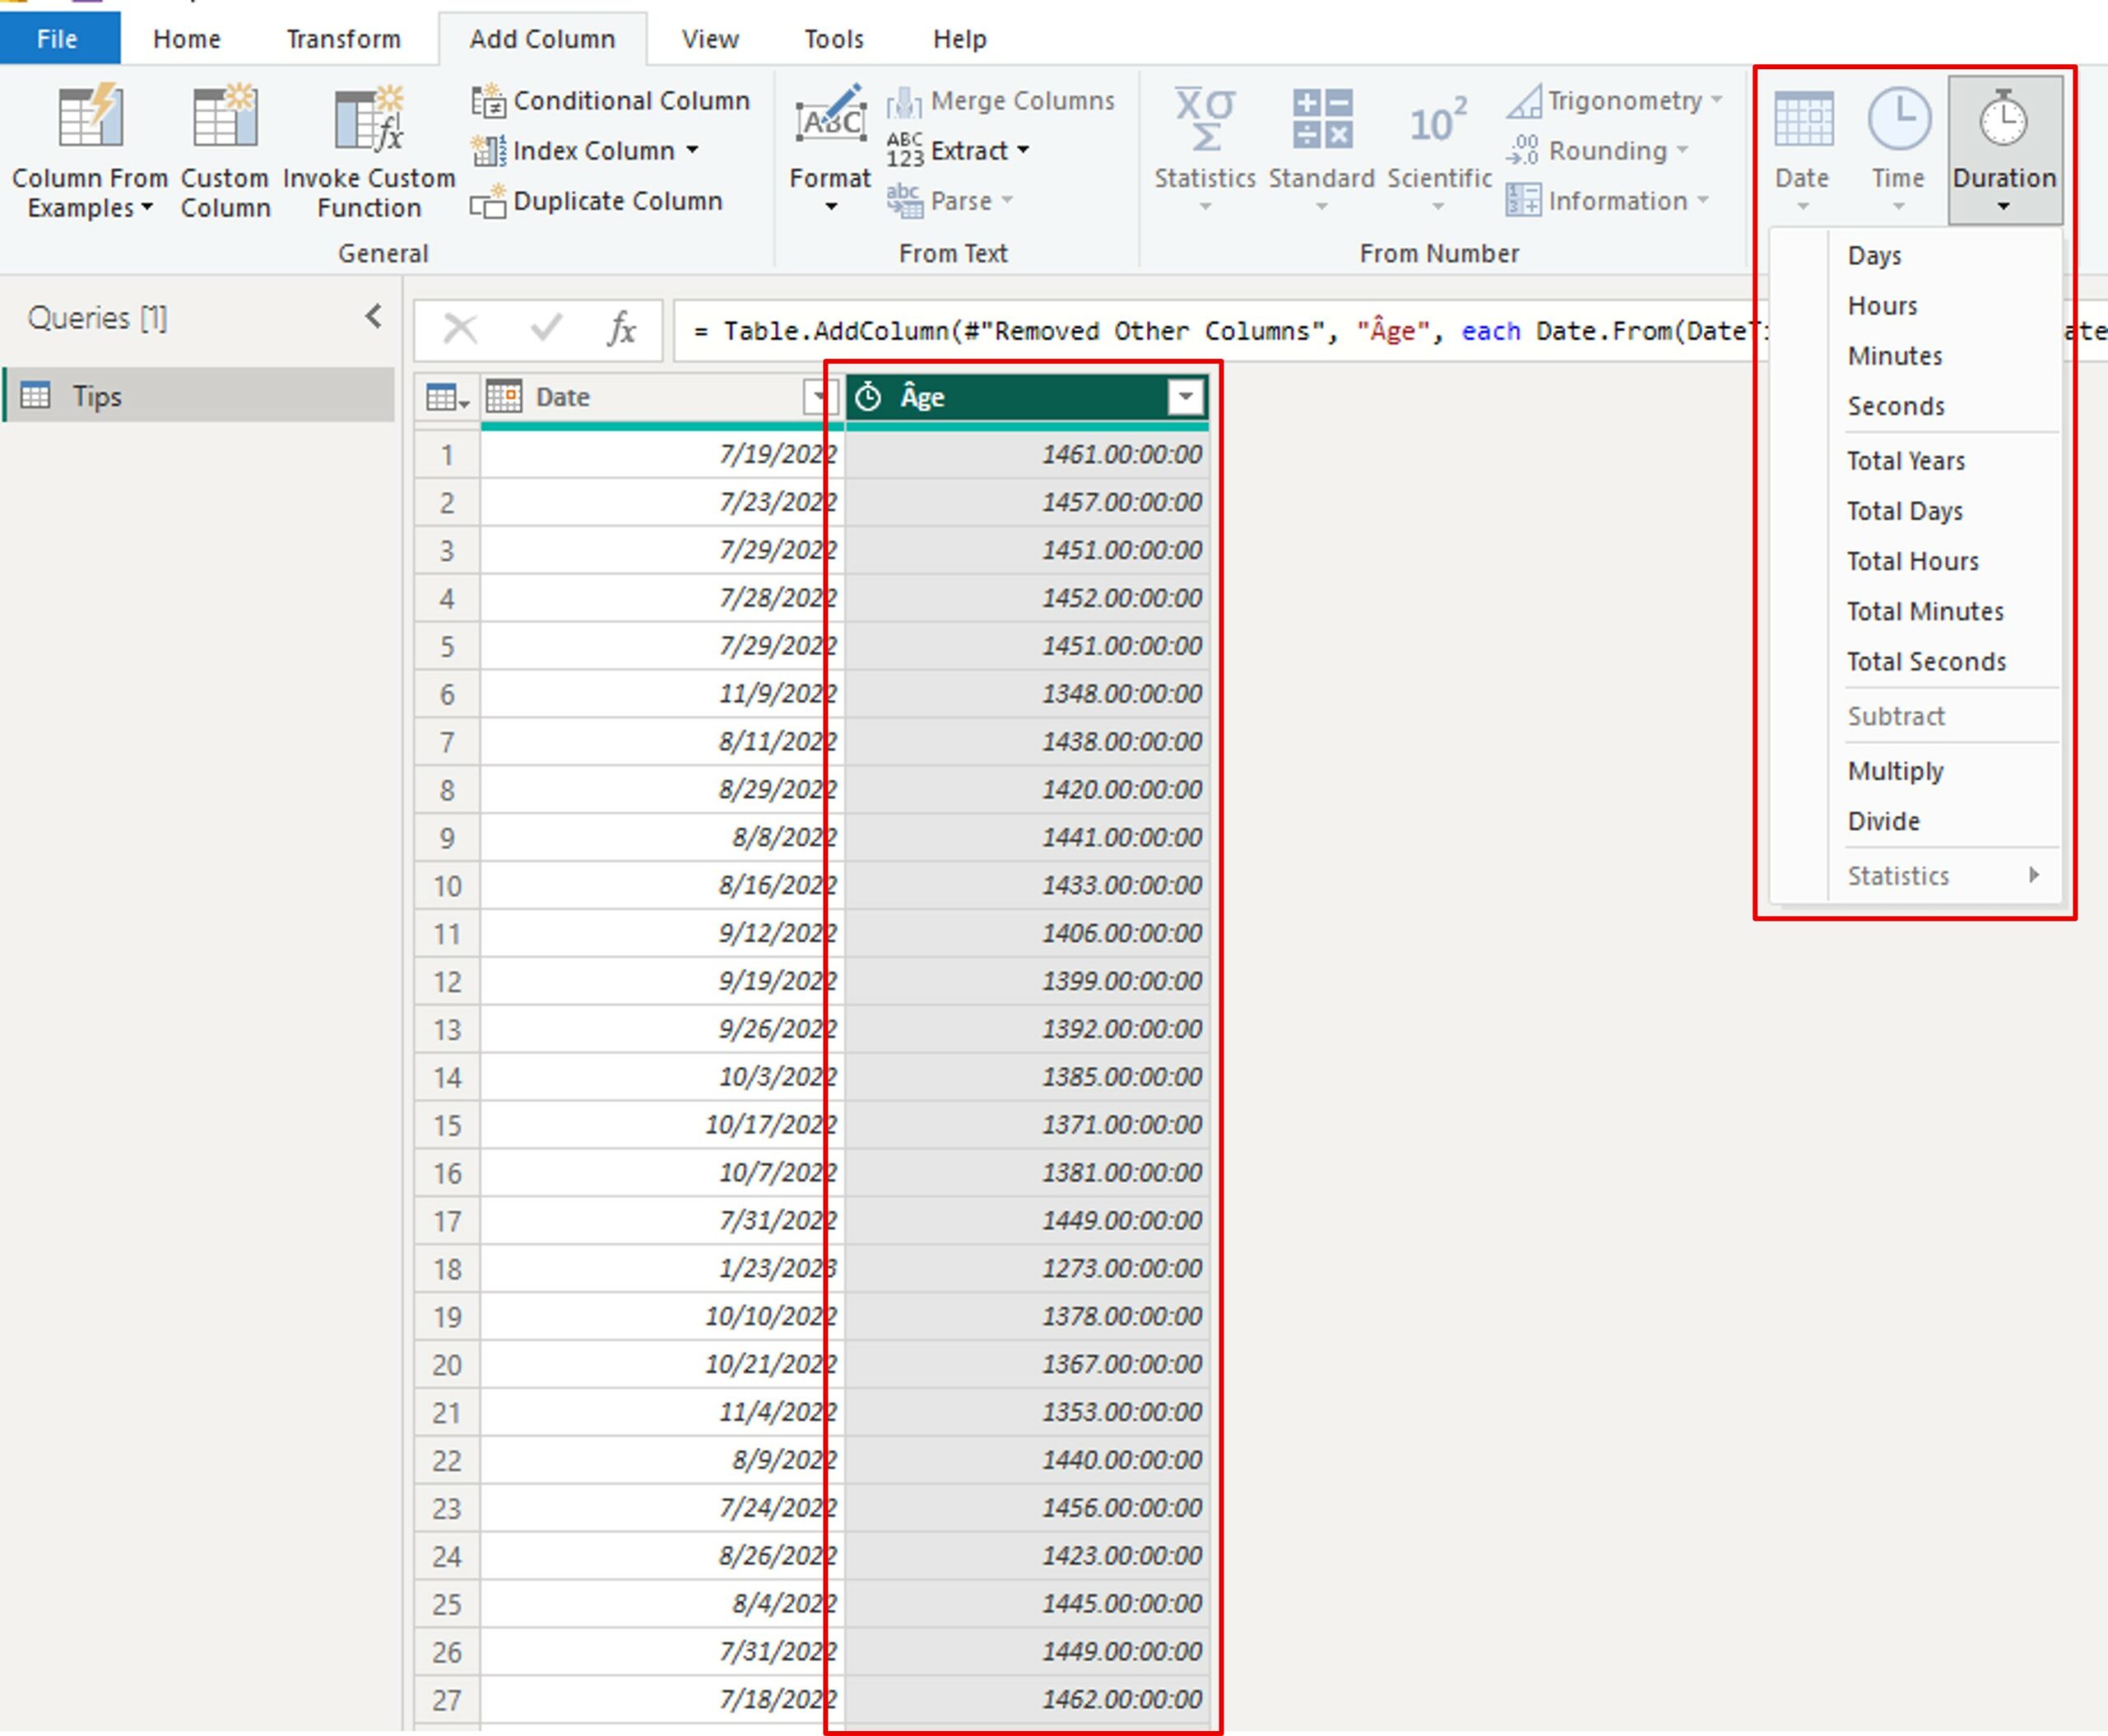
This adds a column containing the difference between the date and the current time, as a duration.
To convert this duration, click Duration and then choose how you want to convert it (days, hours, years, etc.).
For this step, you can go to the Transform menu because this column won‘t necessarily be essential.
Power Query limits
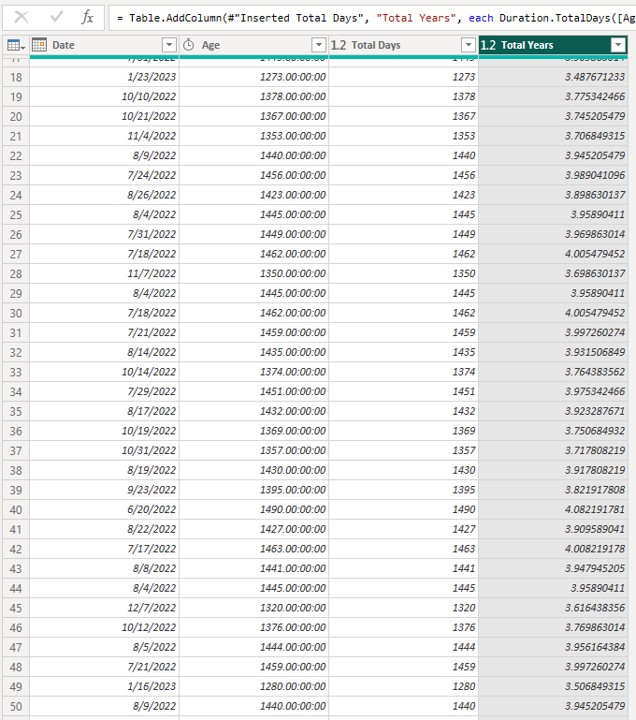
In our example, we continued in the Add Column menu.
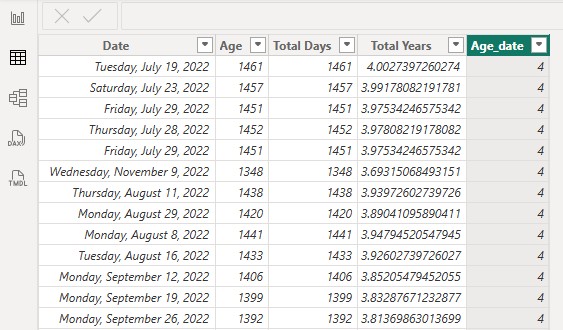
To see the difference, a column converts the duration to days and one to years.
The Years column should be rounded up or down for better readability.
If you prefer to work on the model side rather than on the query side, the DAX method is just as simple.
Calculate an age with DAX
Add a DAX column
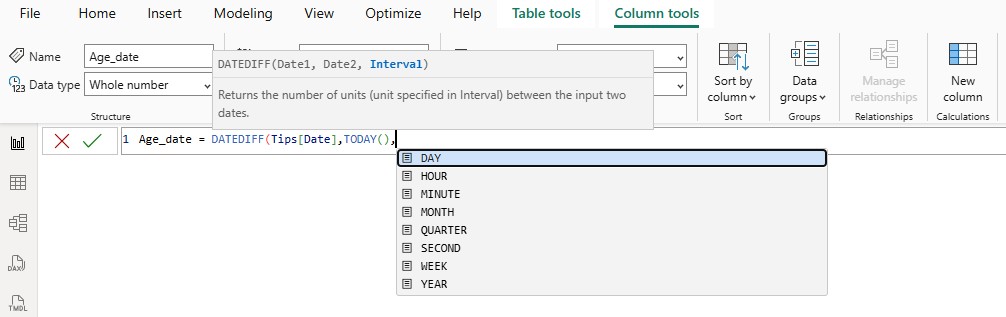
To calculate an age in DAX, add a column from the Modeling menu, and then click New column.

Understanding the DATEDIFF function
The DATEDIFF function allows you to calculate the difference between two dates in days, months, years, or even minutes or seconds.
[Nom_Nouvelle_Colonne] = DATEDIFF (Date1, Date2, Intervalle)
The logic is very similar to Excel‘s DATEDIF function, which also calculates the difference between two dates.
Excel: DATEDIF calculates the difference between two dates
Example formula
In the formula area:
- Name the new column
- After the = sign, use the DATEDIFF function. It allows you to calculate the difference between 2 dates.
- The 1st argument is the column containing the date. Type the query name first, and then the column name.
- The 2nd argument is TODAY() to get the current date. But you could use another column that contains a date.
- Finally, the last argument is the interval. You can choose to return the age in Day, Hour, Minute, Month, Quarter, Second, Week, or Year.
[Nom_Nouvelle_Colonne] = DATEDIFF(Table[Colonne],TODAY(),YEAR)
When you go to the table view, you can see the column calculated in DAX. This is directly rounded.
Which method should you choose?
| Method | For whom? | Benefits | Limitations |
|---|---|---|---|
| Power Query | Those who prepare the data | Simple, visual | No months/quarters |
| DAX | Those who model | Flexible, powerful | Requires a formula |
Conclusion
Whether you choose Power Query or DAX, calculating an age in Power BI remains quick and easy to set up.
The key is to select the method that best fits your model and your work habits. You now have all the keys to obtain a reliable and exploitable result.